Arduino
(→Doplňky:) |
(→What is available...) |
||
| (Není zobrazeno 92 mezilehlých verzí od 2 uživatelů.) | |||
| Řádka 1: | Řádka 1: | ||
| − | + | {| class="toccolours" cellpadding="5" style="float: right; clear: right; margin: 0 0 1em 1em; font-size: 85%; width: 30em" | |
| − | + | | colspan="2" style="text-align: center; font-size: larger; background-color: lightgreen;" | '''''Arduino ''''' | |
| + | |- style="vertical-align: top;" | ||
| + | | | ||
| − | + | [[Soubor:Kniha_Aruino.cz.png|link=http://arduino.cz/]] | |
| − | * Mikrokontrolér: ATmega168 / ATmega328 | + | * Mikrokontrolér: [[AVR]] ATmega168 / ATmega328 |
* Takt procesoru: 16 MHz | * Takt procesoru: 16 MHz | ||
* Pracovní napětí: 5V (Vstupní napětí (doporučené): 7 až 12V) | * Pracovní napětí: 5V (Vstupní napětí (doporučené): 7 až 12V) | ||
| Řádka 15: | Řádka 17: | ||
* EEPROM: 512 bytů (ATmega168) nebo 1 KB (ATmega328) | * EEPROM: 512 bytů (ATmega168) nebo 1 KB (ATmega328) | ||
| − | = | + | [[Soubor:Ardiono-day.jpg|link=https://plzenskybarcamp.cz/2015/arduino-day]] |
| + | |} | ||
| − | = | + | [[Soubor:Arduino_01.jpg|thumb|Arduino Duemilanove]] |
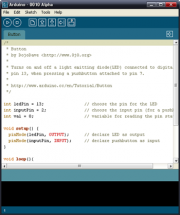
| + | [[Soubor:Arduino_02.png|thumb|link=http://arduino.cc/hu/Main/Software|Download SW]] | ||
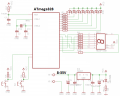
| + | [[Soubor:Arduino_04.jpg|thumb|Schéma]] | ||
| − | + | ==Vývoj MIT aplikace s Arduino:== | |
| + | === What we needs: === | ||
| + | Sestavy: | ||
<Gallery> | <Gallery> | ||
| − | Soubor: | + | Soubor:arduino_KNP.jpg|[https://en.wikipedia.org/wiki/ATmega328 ATmega328] + bootloader [http://uart.cz/452/arduino-na-nepajivem-poli/ Návod] [http://www.xappsoftware.com/wordpress/2012/04/16/how-to-upload-sketches-to-arduino-uno-chip-using-pl2303-usb-to-rs-232-converter/ How to using PL2303] |
| − | + | Soubor:Arduino_Nanino.jpg|[http://vonkonow.com/wordpress/2012/10/nanino-the-diy-friendly-arduino/ Nanino] + [http://goo.gl/J8zTA7 CP2104 s DTR] | |
| − | Soubor: | + | Soubor:Atmega328-sch.png |
</Gallery> | </Gallery> | ||
| − | + | == Examples == | |
| − | + | [[Soubor:Arduino-blik-01.jpg|right]] | |
| − | + | ||
| − | + | ||
| − | Soubor: | + | |
| − | + | ||
| − | + | ||
<source lang"C"> | <source lang"C"> | ||
| − | / | + | /* Blink * http://www.arduino.cc/en/Tutorial/Blink |
| − | * Blink | + | |
| − | * http://www.arduino.cc/en/Tutorial/Blink | + | |
*/ | */ | ||
| − | int ledPin = 13; | + | int ledPin = 13; // LED je připojena na pin 13 |
| − | void setup() // tato část proběhne jednou po startu | + | void setup(){ // tato část proběhne jednou po startu |
| − | + | pinMode(ledPin, OUTPUT); // nastaví pin jako výstupní | |
| − | pinMode(ledPin, OUTPUT); // nastaví pin jako výstupní | + | |
} | } | ||
| − | void loop() | + | void loop(){ // procedura |
| − | + | digitalWrite(ledPin, HIGH); // rozsvícení LED | |
| − | digitalWrite(ledPin, HIGH); // rozsvícení LED | + | delay(1000); // pauza 1s |
| − | delay(1000); // pauza 1s | + | digitalWrite(ledPin, LOW); // zhasnutí LED |
| − | digitalWrite(ledPin, LOW); // zhasnutí LED | + | delay(1000); // pauza 1s |
| − | delay(1000); // pauza 1s | + | |
} | } | ||
</source> | </source> | ||
| − | == | + | == Tools: == |
| + | |||
<gallery> | <gallery> | ||
| + | Soubor:Arduino_blink.jpg|[http://blog.ardublock.com/ ArduBlock] | ||
| + | Soubor:123d.jpg|[https://www.tinkercad.com/ tinkercad - web Arduino IDE] | ||
| + | Soubor:simulide.jpg|[http://sourceforge.net/projects/simulide/ SimulIDE] | ||
| + | Soubor:Code-Blocks.png|[http://www.arduinodev.com/codeblocks/ CodeBlocks - web Arduino IDE] | ||
| + | Soubor:Codebender.png|[https://codebender.cc/how_it_works Codebender - web Arduino IDE] | ||
| + | </gallery> | ||
| + | |||
| + | *.hex you can find in c:\Users\*\Local Settings\Temp\build*.tmp\*.hex | ||
| + | |||
| + | == Tutorials: == | ||
| + | <gallery> | ||
| + | Soubor:Arduino_Comic.jpg|[[Soubor:Icon-pdf.gif]] [http://playground.arduino.cc/uploads/Main/arduino_comic_v0004.pdf Arduino Comic] [http://playground.arduino.cc/uploads/Main/arduino_comic_blank.pdf Blank for CZ] | ||
| + | Soubor:Arduino-itnetwork.png|[http://www.itnetwork.cz/mikrokontroler-arduino-tutorialy Tutorial] | ||
| + | Soubor:Arduino-adafruit.png|[http://learn.adafruit.com/series/learn-arduino LEARN ARDUINO 18 GUIDES] | ||
| + | Soubor:Konstrukce_robota_arduino.jpg|[http://avc.siliconhill.cz/installfest-2013/ Konstrukce a použití Arduino robota (Vladimír Jarý)] | ||
| + | Soubor:Introduction_to_the_Arduino.jpg|[http://www.youtube.com/watch?v=CqrQmQqpHXc An Introduction to the Arduino] | ||
Soubor:arduino_tutorial_series_jeremy_blum.jpg|[http://www.jeremyblum.com/portfolio/arduino-tutorial-series/ Arduino Tutorial Series by Jeremy Blum] | Soubor:arduino_tutorial_series_jeremy_blum.jpg|[http://www.jeremyblum.com/portfolio/arduino-tutorial-series/ Arduino Tutorial Series by Jeremy Blum] | ||
Soubor:arduino_tutorial.jpg|[http://www.ladyada.net/learn/arduino/index.html Arduino Tutorial - Step by Step] | Soubor:arduino_tutorial.jpg|[http://www.ladyada.net/learn/arduino/index.html Arduino Tutorial - Step by Step] | ||
| − | Soubor: | + | Soubor:Arduino_Tutorial_Bundle.jpg|[http://www.instructables.com/id/Arduino-Expermentation-Kit-How-to-get-Started-wi/?ALLSTEPS Arduino Tutorial Bundle] |
Soubor:Arduino-c.jpg|[http://www.linuxsoft.cz/article.php?id_article=1877 Arduino - programování v čistém C(++)] | Soubor:Arduino-c.jpg|[http://www.linuxsoft.cz/article.php?id_article=1877 Arduino - programování v čistém C(++)] | ||
Soubor:Arduino-root-cz.jpg|[http://www.root.cz/clanky/arduino-jak-pro-nej-zacit-programovat/ Jak pro něj začít programovat - seriál na ROOT.cz] | Soubor:Arduino-root-cz.jpg|[http://www.root.cz/clanky/arduino-jak-pro-nej-zacit-programovat/ Jak pro něj začít programovat - seriál na ROOT.cz] | ||
| Řádka 67: | Řádka 82: | ||
Soubor:arduino-josefnav.jpg|[http://www.josefnav.cz/Arduino.html Popis od Josefa NAV] | Soubor:arduino-josefnav.jpg|[http://www.josefnav.cz/Arduino.html Popis od Josefa NAV] | ||
Soubor:arduinocheatsheet.png|[http://sites.google.com/site/mechatronicsguy/arduinocheatsheet download] | Soubor:arduinocheatsheet.png|[http://sites.google.com/site/mechatronicsguy/arduinocheatsheet download] | ||
| + | Soubor:arduino-playground.jpg| [http://playground.arduino.cc/Code/BitMath#binary Bit Math Tutorial by CosineKitty] | ||
| + | Soubor:arduino-wiring-ledswing.jpg| [http://wiring.org.co/learning/basics/ledswing.html Learning with Wiring -LEDSwing] | ||
</gallery> | </gallery> | ||
| − | ==Aplikace | + | == Aplikace s Arduino == |
| − | + | {{Zajímavá zapojení s Arduino}} | |
| − | + | ||
| − | + | ||
| − | + | ||
| − | + | ||
| − | + | ||
| − | + | ||
| − | + | ||
| − | + | ||
| − | + | ||
| − | + | ||
| − | + | ||
| − | + | ||
| − | + | ||
| − | + | ||
| − | + | ||
| − | + | ||
| − | + | ||
| − | + | ||
| − | + | ||
| − | + | ||
| − | + | ||
| − | + | ||
| − | + | ||
| − | + | ||
| − | + | ||
| − | + | ||
| − | + | ||
| − | + | ||
| − | + | ||
| − | + | ||
| − | + | ||
| − | + | == Videa == | |
| − | == | + | {{#widget:YouTube|id=o0GyeYBJ4QM|height=160|width=240|link=http://www.x-sim.de/forum/viewtopic.php?f=40&t=155}} |
| + | {{#widget:YouTube|id=azfPoXOmKog|height=160|width=240|link=http://www.buildcircuit.com/decimal-to-binary-converter-using-cd4094-android-phone-and-bluesmirf/}} | ||
| + | {{#widget:YouTube|id=2HOJjt19-sE|height=160|width=240}} | ||
| − | + | == Experimenty == | |
| − | |||
| − | |||
| − | Soubor: | + | <Gallery> |
| + | Soubor:arduino fotka.jpg|[[Arduino - Compatible 8X Seven Segments Display|Compatible 8X Seven Segments Display]] | ||
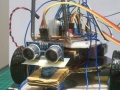
| + | Soubor:Arduiono-robot-pepik.jpg|[[Arduino - Jednoduchá aplikace|Jednoduchá aplikace - Robot Pepík - učebna D10]] | ||
| + | Soubor:arduino-spsavos.jpg|[[Arduino - pohybující text: SPS a VOS|Pohybující text: SPS a VOS Pisek]] | ||
| − | Soubor: | + | Soubor:arduino-pocitadlo.jpg|[[Arduino - datumové počítadlo|Počítadlo: roky - měsíce - dny - hodiny - minuty - sekundy]] |
| + | </Gallery> | ||
| − | |||
| − | |||
| − | == | + | == Arduino Shield by SPŠ == |
| − | + | <Gallery> | |
| − | + | Soubor:arduino_shield_UNI.jpg | |
| + | </Gallery> | ||
| + | == www == | ||
| − | + | [http://uart.cz/394/arduino-a-usb/ Arduino a USB] | |
| − | [http:// | + | [[Soubor:Pdf.jpg]] [http://robodoupe.cz/wp-content/uploads/2013/04/Arduino-a-PICAXE-na-Windows-8-64.pdf Arduino a PICAXE na Windows 8 64-bit] |
| − | + | ||
| − | + | ||
| − | + | ||
| − | + | ||
| − | + | [[Kategorie:SW]] | |
| − | + | [[Kategorie:HW]] | |
| − | + | [[Kategorie:MIT]] | |
| − | |||
| − | |||
| − | |||
| − | |||
| − | + | == advance == | |
| − | + | ||
| − | + | ||
| − | + | ||
| − | + | ||
| − | + | ||
| − | + | ||
| − | + | ||
| − | + | ||
| − | + | ||
| − | + | ||
| − | + | ||
| − | + | ||
| − | + | ||
| − | + | [http://achuwilson.wordpress.com/2011/12/15/arduino-ide-for-programming-atmega-microcontrollers/ Arduino IDE for programming Atmega Microcontrollers] | |
| − | + | [http://tutorial.cytron.com.my/2011/09/30/how-to-program-arduino-by-using-avr-usbasp-programmer/ How to program Arduino by using USBasp without bootloader] | |
| − | + | ||
| − | + | [http://www.arduino.cc/en/Main/Standalone Building an Arduino on a Breadboard] | |
| − | / | + | |
| − | + | ||
| − | + | ||
| − | + | ||
| − | + | ||
| − | + | ||
| − | + | ||
| − | + | ||
| − | // | + | [http://www.virtualbreadboard.com/Main.aspx?TAB=4&doc=Tutorials/Arduino/Import%20Arduino%20Sketches/Import%20Arduino%20Sketches Virtual Breadboard] |
| − | + | ||
| − | // | + | [http://arduinodiy.wordpress.com/2012/03/19/serial-connection-for-your-arduino-atmega/ Serial connection for your Arduino / Atmega] |
| − | + | ||
| − | // | + | [http://www.electrodragon.com/w/DIY_Arduino#Basic_Minimal_Arduino_Without_Crystal Basic Minimal Arduino Without Crystal] |
| − | + | ||
| − | // | + | |
| − | + | ||
| − | + | [http://todbot.com/blog/2009/05/26/minimal-arduino-with-atmega8/ Minimal Arduino with ATmega8] | |
| − | + | ||
| − | + | ||
| − | + | ||
| − | + | [http://www.instructables.com/id/Burning-the-Bootloader-on-ATMega328-using-Arduino-/?ALLSTEPS Burning the Bootloader on ATMega328 using Arduino UNO as ISP] | |
| − | + | ||
| − | + | ||
| − | + | ||
| − | + | [http://www.instructables.com/id/USBASP-Bootloading-a-ATMega328p-with-a-8mhZ-intern/?ALLSTEPS USBASP Bootloading a ATMega328p with a 8MHz internal clock] | |
| − | + | ||
| − | + | ||
| − | + | [http://www.instructables.com/id/Make-your-own-arduino-serverino/?ALLSTEPS Make your own arduino serverino] | |
| − | + | ||
| − | + | ||
| − | + | ||
| − | + | ||
| − | + | ||
| − | + | ||
| − | + | ||
| − | + | [https://www.youtube.com/watch?v=3imfP2TZbNc Arduino Voice Control using Smartphone] | |
| − | + | ||
| − | + | == Shield == | |
| − | + | [[Soubor:How to Build the LOL Shield Kit.jpg|link=http://www.youtube.com/watch?v=FVRrOtP1Dvk|thumb|How to Build the LOL Shield Kit]] | |
| + | LoL Shield věnovaný sponzorem školy: [http://aukro.cz/listing/user.php?us_id=23961189 jitenkaa], (zde je možné stavebnici objednat) | ||
| − | + | {{#widget:YouTube|id=sWpqH37Zb9M|height=360|width=480|LoL Shield od sponzora jitenkaa|centre}} | |
| − | + | ||
| − | + | <gallery> | |
| − | + | Soubor:Arduino_4WD_robot-smart.jpg|[http://goo.gl/YOGRFI 4WD Robot Smart Car Chassis Kits] | |
| − | + | Soubor:Arduino_deal.jpg|[http://goo.gl/bzhxD9 Arduino Robot Car Kits] | |
| − | + | Soubor:CP2104.jpg|[http://goo.gl/U4ajVi|USB CP2104 TTL] | |
| − | + | Soubor:6bit-Chartreuse-LED-Arduino.jpg|[http://goo.gl/yE4oyM 6bit Chartreuse LED for Arduino] | |
| − | + | Soubor:8-LED.jpg|[http://goo.gl/cnKXhz 8 Channels Flowing Water Light LED] | |
| − | + | ||
| − | + | ||
| − | + | ||
| − | + | ||
| − | + | ||
| − | + | ||
| − | + | Soubor:ht1632c.jpg|[https://www.instructables.com/User-Manual-MAX7219-Dot-Matrix-4-in-1/ MAX7219 Matrix Display] | |
| − | + | ||
| − | + | ||
| − | |||
| − | |||
| − | |||
| − | + | </gallery> | |
| − | + | ||
| − | + | ||
| − | + | ||
| − | + | === What is available... === | |
| − | + | ||
| − | + | ||
| − | + | <gallery> | |
| − | + | Soubor:Multifunctional Expansion Board.png|[[:Soubor:MFEB-schematic.png|schéma]] [[:Soubor:MFEB-example.pdf|příklady]] | |
| − | + | Soubor:Arduino-Ethernet.jpg|[http://arduino.cc/en/Main/ArduinoEthernetShield Arduino Ethernet Shield W5100 + microSD]|[http://arduino.cc/en/Reference/Ethernet knihovna] | |
| + | Soubor:USB_UART_TTL_CH340.png|USB převodník UART TTL s čipem CH340 | ||
| + | Soubor:Bluetooth_modul_HC-06.png|[http://www.rasmicro.com/Bluetooth/EGBT-045MS-046S%20Bluetooth%20Module%20Manual%20rev%201r0.pdf Modul HC-06 Bluetooth] [http://goo.gl/aWFkIi Bluetooth Transceiver Module] [http://www.buildcircuit.com/decimal-to-binary-converter-using-cd4094-android-phone-and-bluesmirf/ aplikace] | ||
| − | + | Soubor:dot-matrix-display.jpg|[http://arduino-er.blogspot.cz/2015/01/arduino-uno-spi-8x8-led-matrix-with.html 8x8 LED Matrix with MAX7219] | |
| − | + | Soubor:R8X_Digital.jpg|[http://goo.gl/LxJdXJ 8-Bit Double Color LED TM1638 Arduino] | |
| − | + | ||
| − | + | Soubor:lcd-keypad-shield-for-arduino.jpg|[http://goo.gl/dTfeHv LCD Keypad Shield] | |
| − | + | Soubor:IIC-Serial-Interface-LCD.jpg|[http://goo.gl/OZYx1x IIC/I2C/TWI/SPI Serial Interface Arduino 1602LCD] | |
| − | + | ||
| − | + | Soubor:Arduino-Clock-Shield.jpg|[http://goo.gl/YGz6ZT RTC TM1636 DS1307] [http://www.seeedstudio.com/wiki/Tick_Tock_Shield_Kit Clock Datalogger Shield Wire Digital Module RTC TM1636 DS1307] | |
| − | + | ||
| − | + | ||
| − | + | Soubor:RTC-Arduino.jpg|[http://goo.gl/4xY2Ny RTC DS1307 I2C AT24C32 Arduino] | |
| − | + | ||
| − | + | ||
| − | + | Soubor:ISD1820-Voice-Board.jpg|[http://goo.gl/iob0l6 ISD1820 Voice Board] | |
| − | + | ||
| − | + | ||
| − | + | Soubor:Arduino-Stepper-Motor-ULN2003.jpg|[http://goo.gl/YtQEAv 2X DC 5V Stepper Motor + ULN2003 Driver Test Module Board 28BYJ-48 for Arduino] | |
| − | + | Soubor:Motor-drive-L293D.jpg|[http://goo.gl/blES3Y Motor Drive Shield Expansion Board L293D] | |
| − | + | Soubor:RC522-Mifare-RFID.png|[http://playground.arduino.cc/Learning/MFRC522 Mifare MFRC522 RFID Reader/Writer] | |
| − | + | Soubor:HC-SR04-ultrasonic.png|HC-SR04 Ultrazvukový senzor-ultrasonic | |
| − | + | Soubor:DHT11 _1113.png|[http://www.micro4you.com/files/sensor/DHT11.pdf Arduino senzor vlhkosti a teploty DHT11] | |
| + | Soubor:Modul_4x7seg_display_TM1637.png|[http://mcustore.cz/products/300904/TM1637_sch.png Modul 4x7seg display TM1637]|[http://robotstore.cz/wp-content/uploads/2014/01/4-Digit-Display-v0.9b%E5%8E%9F%E7%90%86%E5%9B%BE.pdf]|[http://www.titanmec.com/doce/product-detail-396.html Datasheet]|[http://mcustore.cz/products/300904/DigitalTube.zip DigitalTube]|[http://mcustore.cz/products/300904/TimerOne-r11.zip TimerOne]|[http://robotstore.cz/wp-content/uploads/2014/01/DigitalTubeforArduino1.0+.rar Příklady] | ||
| − | + | Soubor:Cidlo_teploty_a_vlhkosti_DHT22_AM2302.png|[http://mcustore.cz/products/102005/DHT22.pdf Čidlo teploty a vlhkosti DHT22] | |
| + | Soubor:Membranova_klavesnice_4x3.png|Membránová klávesnice 4x3 Slim | ||
| + | Soubor:Modul_pro_SD_karty.png|[http://mcustore.cz/products/300207/sdcard_sch.jpg Modul pro SD karty] | ||
| + | Soubor:Mini_SD_AD4_Audio.png|[http://www.buildcircuit.com/example-1-using-wtv020sd-16p-music-module-with-arduino/ Mini SD AD4 Audio Přehrávač] | ||
| − | + | Soubor:Adresovatelna_RGB_LED_5V_SMD.png|[http://www.instructables.com/id/Best-RGB-LEDs-for-any-project-WS2812/?ALLSTEPS Adresovatelná RGB LED 5V SMD WS2812] | |
| − | - | + | Soubor:Adresovatelna_RGB_deska_3xLED_12V.png|[http://www.adafruit.com/datasheets/WS2811.pdf Adresovatelná_RGB deska 3xLED 12V WS2811] |
| − | - | + | Soubor:Arduino_gyroskop_akcelerometr.png|[http://invensense.com/mems/gyro/documents/PS-MPU-6000A.pdf Gyroskop akcelerometr MPU-6050 I2C] |
| − | + | Soubor:digitalni_kompas_HMC5883L.png|[http://www51.honeywell.com/aero/common/documents/myaerospacecatalog-documents/Defense_Brochures-documents/HMC5883L_3-Axis_Digital_Compass_IC.pdf 3-osý digitální kompas HMC5883L] | |
| + | Soubor:L298N_Arduino_DC_Motor_H-Mustek.png|L298N Arduino Duální Řadič DC Motor H-Můstek | ||
| + | Soubor:Sensor_Shield_V5.png|Sensor Shield V5 | ||
| + | Soubor:Matrix8x8-Arduino.png|[http://www.gme.cz/led-display-maticovy-32x32mm-rg-hd-m10eg88md-p512-178 GME.cz] [http://arduino-er.blogspot.cz/2015/02/beating-heart-animation-on-8x8-led.html 8x8 LED Matrix] [http://www.instructables.com/id/Intermediate-Arduino-Inputs-and-Outputs/?ALLSTEPS] | ||
| + | Soubor:RGB-LED.png|RGB LED Strip | ||
| + | Soubor:Arduino-Full-Color-RGB.jpg|[https://www.instructables.com/LED-Multiplexing-101-6-and-16-RGB-LEDs-With-Just-a/ Full Color RGB 8-SMD 5050 LED Module] | ||
| + | Soubor:WeMOS D1.png|[http://educ8s.tv/esp8266-ota-wemos-d1/ WeMOS D1] | ||
| + | Soubor:MEMSIC_2125.png|[https://www.parallax.com/product/28017 MEMSIC 2125 Dual-axis Accelerometer] | ||
| + | Soubor:H48C.png|[https://itp.nyu.edu/archive/physcomp-spring2014/sensors/Reports/H48C.html H48C - 3 Axis Accelerometer] | ||
| + | Soubor:ACS712.png|[https://www.electronicshub.org/interfacing-acs712-current-sensor-with-arduino/ Proudový senzor 30A ACS712] | ||
| + | </gallery> | ||
| − | + | === Examples 2 === | |
| − | + | # LED bliká v Morseově abecedě SOS ( . . . - - - . . . ) s opakováním s časovým odstupem 4 sekundy | |
| − | + | # 8 LED bliká dle pravdivostní tabulky tak, aby svítala v daném čase postupně jen jedna LED (had) | |
| − | # | + | # Aktivací tlačítka LED, která předtím svítila zhasne |
| − | # | + | # Každým zmáčknutím tlačítka se změní stav LED na opačný |
| + | # Jedním tlačítkem LED zhasne a jiným se rozsvítí | ||
| − | + | ==== Test tlačítka ==== | |
| + | [[Soubor:Button-LED.png|200px|right]] | ||
| − | + | <source lang"Csharp"> | |
| − | + | void setup() | |
| − | + | { | |
| − | + | pinMode( 2, INPUT_PULLUP); | |
| − | + | pinMode( 8, OUTPUT); | |
| − | + | ||
| − | + | ||
| − | + | ||
| − | + | ||
| − | + | ||
| − | + | ||
| − | void setup() { | + | |
| − | + | ||
| − | + | ||
| − | + | ||
| − | + | ||
| − | + | ||
| − | + | ||
} | } | ||
| + | |||
| + | void loop() | ||
| + | { | ||
| + | digitalWrite( 8 , !digitalRead(2) ); | ||
| + | } | ||
| + | </source> | ||
| − | + | <source lang"Csharp"> | |
| − | + | const int buttonPin = 2; // | |
| − | + | const int ledPin = 8; // | |
| − | + | ||
| − | + | ||
| − | + | ||
| − | + | ||
| − | + | ||
| − | + | ||
| − | + | ||
| − | + | int buttonState = 0; // variable | |
| − | + | ||
| − | + | ||
| − | + | ||
| − | + | ||
| − | + | ||
| − | + | ||
| − | + | ||
| − | + | ||
| − | + | ||
| − | + | ||
| − | + | ||
| − | + | ||
| − | + | ||
| − | + | ||
| − | + | ||
| − | + | ||
| − | + | ||
| − | + | ||
| − | + | ||
| − | + | ||
| − | + | ||
| − | + | ||
| − | + | ||
| − | + | ||
| − | + | ||
| − | + | ||
| − | + | ||
| − | + | ||
| − | + | ||
| − | + | ||
| − | + | void setup() { | |
| − | + | pinMode(ledPin, OUTPUT); | |
| − | + | pinMode(buttonPin, INPUT); | |
| − | + | ||
| − | + | ||
| − | + | ||
| − | + | ||
| − | + | ||
} | } | ||
void loop() { | void loop() { | ||
| − | + | buttonState = digitalRead(buttonPin); | |
| − | + | if (buttonState == HIGH) { | |
| + | digitalWrite(ledPin, HIGH); | ||
| + | } | ||
| + | else { | ||
| + | digitalWrite(ledPin, LOW); | ||
} | } | ||
} | } | ||
| − | |||
</source> | </source> | ||
| − | |||
| − | |||
| − | |||
| − | + | ==== Traffic light ==== | |
| − | + | ||
| + | [[Soubor:Test-traffic-light.png|200px|right]] | ||
| + | <source lang="csharp"> | ||
| + | int pin; | ||
void setup() { | void setup() { | ||
| − | + | for (int i=4; i <= 13; i++){ | |
| − | + | pinMode(i, OUTPUT); | |
| + | } | ||
} | } | ||
| − | void | + | void blik(int pin) |
| − | + | { | |
| + | digitalWrite(pin, LOW); | ||
| + | delay(500); | ||
| + | digitalWrite(pin, HIGH); | ||
| + | } | ||
| − | + | void loop() | |
| − | + | { | |
| + | for (int i=4; i <= 13; i++){ | ||
| + | blik(i); | ||
| + | } | ||
} | } | ||
| + | |||
</source> | </source> | ||
| − | + | ==== DC motor ==== | |
| − | + | ||
| − | + | ||
| − | + | [[Soubor:L298N_Arduino_DC_Motor_H-Mustek.png|200px|right]] | |
| + | <source lang="csharp"> | ||
| + | int MotorL1 = 3; | ||
| + | int MotorL2 = 11; | ||
| + | int MotorR1 = 5; | ||
| + | int MotorR2 = 6; | ||
| − | + | void loop() { | |
| − | + | MotorForward(); | |
| − | + | delay(2000); | |
| − | + | TurnLeft(); | |
| − | + | delay(2000); | |
| − | + | ||
| − | + | ||
| − | + | ||
| − | + | ||
} | } | ||
| − | + | void MotorForward() { | |
| − | + | digitalWrite(MotorL1, LOW); // | |
| + | digitalWrite(MotorL2, HIGH); // | ||
| + | digitalWrite(MotorR1, LOW); // | ||
| + | digitalWrite(MotorR2, HIGH); // | ||
| + | } | ||
| + | |||
| + | void TurnLeft() { | ||
| + | analogWrite(MotorL1, LOW); // | ||
| + | analogWrite(MotorL2, 128); // | ||
| + | analogWrite(MotorR1, 128); // | ||
| + | digitalWrite(MotorR2, LOW); // | ||
| + | } | ||
| + | </source> | ||
| − | + | ==== RGB ==== | |
| − | + | ||
| − | + | ||
| − | + | [[Soubor:RGB-LED.png|200px|right]] | |
| − | + | ||
| − | + | ||
| − | + | ||
| − | + | ||
| − | + | ||
| − | + | <source lang="csharp"> | |
| + | ..... | ||
| − | + | void loop() | |
| − | + | { | |
| − | + | setColor(255, 0, 0); // red | |
| − | + | delay(1000); | |
| − | delay( | + | setColor(0, 255, 0); // green |
| + | delay(1000); | ||
| + | setColor(0, 0, 255); // blue | ||
| + | delay(1000); | ||
| + | setColor(255, 255, 0); // red + green | ||
| + | delay(1000); | ||
| + | setColor(255, 0, 255); // red + blue | ||
| + | delay(1000); | ||
| + | setColor(0, 255, 255); // green + blue | ||
| + | delay(1000); | ||
| + | } | ||
| + | |||
| + | void setColor(int red, int green, int blue) | ||
| + | { | ||
| + | analogWrite(redPin, red); | ||
| + | analogWrite(greenPin, green); | ||
| + | analogWrite(bluePin, blue); | ||
} | } | ||
</source> | </source> | ||
| − | |||
| − | |||
| − | |||
| − | + | ==== SR04 ultrasonic ==== | |
| − | + | ||
| − | + | ||
| − | + | ||
| − | + | [[Soubor:HC-SR04-ultrasonic.png|200px|right]] | |
| − | + | ||
| − | + | ||
| − | + | ||
| − | + | <source lang="Csharp"> | |
| − | + | #define trigPin 8 | |
| + | #define echoPin 9 | ||
| − | void setup() | + | void setup() { |
| − | { | + | Serial.begin (9600); |
| − | + | pinMode(trigPin, OUTPUT); | |
| − | + | pinMode(echoPin, INPUT); | |
| − | + | } | |
| − | + | ||
| − | // | + | void loop() { |
| − | + | long duration, distance; | |
| + | digitalWrite(trigPin, LOW); | ||
| + | delayMicroseconds(2); // | ||
| + | digitalWrite(trigPin, HIGH); | ||
| + | delayMicroseconds(10); // | ||
| + | digitalWrite(trigPin, LOW); | ||
| + | duration = pulseIn(echoPin, HIGH); | ||
| + | distance = (duration/2) / 29.1; | ||
| − | + | Serial.print(distance); | |
| − | + | Serial.println(" cm"); | |
| − | + | delay(500); | |
| − | + | ||
| − | + | ||
| − | + | ||
} | } | ||
| + | </source> | ||
| − | + | ==== Servo ==== | |
| − | + | ||
| − | + | ||
| − | + | [[Soubor:servo.png|200px|right]] | |
| − | + | <source lang"Csharp"> | |
| − | + | #include <Servo.h> | |
| − | + | ||
| − | + | Servo myservo; | |
| − | + | ||
| − | + | ||
| − | + | int pos = 0; | |
| − | + | ||
| − | + | ||
| − | + | ||
| − | + | ||
| − | + | ||
| − | + | ||
| − | + | ||
| − | + | ||
| − | + | ||
| − | + | void setup() { | |
| − | + | myservo.attach(6); | |
| − | + | Serial.begin (9600); | |
| − | + | } | |
| − | + | ||
| − | + | ||
| − | + | void loop() { | |
| − | + | for (pos = 0; pos <= 180; pos += 1) { | |
| − | } | + | myservo.write(pos); |
| + | Serial.println(pos); | ||
| + | delay(20); | ||
| + | } | ||
| + | for (pos = 180; pos >= 0; pos -= 1) { | ||
| + | myservo.write(pos); | ||
| + | Serial.println(pos); | ||
| + | delay(20); | ||
| + | } | ||
| + | } | ||
| + | </source> | ||
| − | + | ==== RBT servo ==== | |
| − | + | ||
| − | + | ||
| − | + | ||
| − | + | [[Soubor:servo_2.png|200px|right]] | |
| − | + | ||
| − | + | ||
| − | + | ||
| − | + | <source lang"Csharp"> | |
| − | + | ||
| − | + | #include <Servo.h> // Include servo library | |
| − | + | ||
| + | Servo servoLeft; // Declare left servo signal | ||
| + | unsigned char motion = 0; | ||
| + | |||
| + | void setup() // Built in initialization block | ||
| + | { | ||
| + | pinMode(5,INPUT_PULLUP); | ||
| + | pinMode(6,INPUT_PULLUP); | ||
| + | pinMode(7,INPUT_PULLUP); | ||
| + | pinMode(2,OUTPUT); | ||
| + | pinMode(3,OUTPUT); | ||
| + | pinMode(4,OUTPUT); | ||
| + | pinMode(9,OUTPUT); | ||
| + | servoLeft.attach(9); // | ||
| + | Serial.begin (9600); | ||
} | } | ||
| + | void loop() | ||
| + | { | ||
| + | motion = digitalRead(5) + digitalRead(6)*2 + digitalRead(7)*4; | ||
| + | Serial.print(motion); | ||
| + | Serial.println(""); | ||
| + | switch(motion) | ||
| + | { | ||
| + | case 0b00000110: servoLeft.write(30); digitalWrite(4,HIGH); digitalWrite(3,HIGH); digitalWrite(2,LOW); break; | ||
| + | case 0b00000101: servoLeft.write(60); digitalWrite(4,HIGH); digitalWrite(3,LOW); digitalWrite(2,HIGH); break; | ||
| + | case 0b00000011: servoLeft.write(90); digitalWrite(4,LOW); digitalWrite(3,HIGH); digitalWrite(2,HIGH); break; | ||
| + | case 0b00000111: servoLeft.write(120); digitalWrite(4,HIGH); digitalWrite(3,HIGH); digitalWrite(2,HIGH); break; | ||
| + | delay(15); | ||
| + | } | ||
| + | } | ||
</source> | </source> | ||
| − | + | <source lang"Csharp"> | |
| − | + | </source> | |
| − | + | ||
| − | + | ||
Aktuální verze z 11. 6. 2021, 10:28
| Arduino | |
|
| |


Obsah |
Vývoj MIT aplikace s Arduino:
What we needs:
Sestavy:

ATmega328 + bootloader Návod How to using PL2303


Examples

/* Blink * http://www.arduino.cc/en/Tutorial/Blink
*/

int ledPin = 13;                // LED je připojena na pin 13

void setup(){                   // tato část proběhne jednou po startu
     pinMode(ledPin, OUTPUT);   // nastaví pin jako výstupní
}

void loop(){                      // procedura
    digitalWrite(ledPin, HIGH);   // rozsvícení LED
    delay(1000);                  // pauza 1s
    digitalWrite(ledPin, LOW);    // zhasnutí LED
    delay(1000);                  // pauza 1s
}
Tools:


- .hex you can find in c:\Users\*\Local Settings\Temp\build*.tmp\*.hex
Tutorials:


Aplikace s Arduino
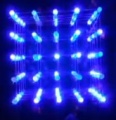
ARD07 LED Cube
ARD05 B4short s L293 + ping [1]


Videa
Experimenty
- Arduiono-robot-pepik.jpg
- Arduino-spsavos.jpg
- Arduino-pocitadlo.jpg

Arduino Shield by SPŠ
- Arduino shield UNI.jpg
www
![]() Arduino a PICAXE na Windows 8 64-bit
Arduino a PICAXE na Windows 8 64-bit
advance
Arduino IDE for programming Atmega Microcontrollers
How to program Arduino by using USBasp without bootloader
Building an Arduino on a Breadboard
Serial connection for your Arduino / Atmega
Basic Minimal Arduino Without Crystal
Burning the Bootloader on ATMega328 using Arduino UNO as ISP
USBASP Bootloading a ATMega328p with a 8MHz internal clock
Make your own arduino serverino
Arduino Voice Control using Smartphone
Shield

LoL Shield věnovaný sponzorem školy: jitenkaa, (zde je možné stavebnici objednat)


What is available...
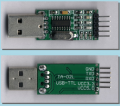
USB převodník UART TTL s čipem CH340
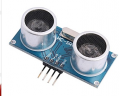
HC-SR04 Ultrazvukový senzor-ultrasonic
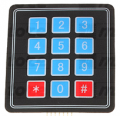
Membránová klávesnice 4x3 Slim
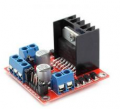
L298N Arduino Duální Řadič DC Motor H-Můstek
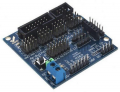
Sensor Shield V5
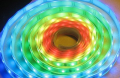
RGB LED Strip


Examples 2
- LED bliká v Morseově abecedě SOS ( . . . - - - . . . ) s opakováním s časovým odstupem 4 sekundy
- 8 LED bliká dle pravdivostní tabulky tak, aby svítala v daném čase postupně jen jedna LED (had)
- Aktivací tlačítka LED, která předtím svítila zhasne
- Každým zmáčknutím tlačítka se změní stav LED na opačný
- Jedním tlačítkem LED zhasne a jiným se rozsvítí
Test tlačítka

void setup()
{
  pinMode( 2, INPUT_PULLUP);
  pinMode( 8, OUTPUT);
}

void loop()
{
  digitalWrite( 8 , !digitalRead(2) );
}
const int buttonPin = 2;     //
const int ledPin =  8;      //

int buttonState = 0;         // variable

void setup() {
  pinMode(ledPin, OUTPUT);
  pinMode(buttonPin, INPUT);
}

void loop() {
  buttonState = digitalRead(buttonPin);
  if (buttonState == HIGH) {
    digitalWrite(ledPin, HIGH);
  }
  else {
    digitalWrite(ledPin, LOW);
  }
}
Traffic light
int pin;

void setup() {
       for (int i=4; i <= 13; i++){
        pinMode(i, OUTPUT);
   }
}

void blik(int pin)
{
        digitalWrite(pin, LOW);
        delay(500);
        digitalWrite(pin, HIGH);
}

void loop()
{
       for (int i=4; i <= 13; i++){
        blik(i);
   }
}
DC motor

int MotorL1 = 3;
int MotorL2 = 11;
int MotorR1 = 5;
int MotorR2 = 6;

void loop() {
  MotorForward();
  delay(2000);
  TurnLeft();
  delay(2000);
}

void MotorForward() {
  digitalWrite(MotorL1, LOW);   //
  digitalWrite(MotorL2, HIGH);  //
  digitalWrite(MotorR1, LOW);   //
  digitalWrite(MotorR2, HIGH);  //
 }

void TurnLeft() {
  analogWrite(MotorL1, LOW);   //
  analogWrite(MotorL2, 128);  //
  analogWrite(MotorR1, 128);   //
  digitalWrite(MotorR2, LOW);  //
 }
RGB

.....

void loop()
{
  setColor(255, 0, 0);  // red
  delay(1000);
  setColor(0, 255, 0);  // green
  delay(1000);
  setColor(0, 0, 255);  // blue
  delay(1000);
  setColor(255, 255, 0);  // red + green
  delay(1000);
  setColor(255, 0, 255);  // red + blue
  delay(1000);
  setColor(0, 255, 255);  // green + blue
  delay(1000);
}

void setColor(int red, int green, int blue)
{
  analogWrite(redPin, red);
  analogWrite(greenPin, green);
  analogWrite(bluePin, blue);
}
SR04 ultrasonic

#define trigPin 8
#define echoPin 9

void setup() {
  Serial.begin (9600);
  pinMode(trigPin, OUTPUT);
  pinMode(echoPin, INPUT);
}

void loop() {
  long duration, distance;
  digitalWrite(trigPin, LOW);
  delayMicroseconds(2); //
  digitalWrite(trigPin, HIGH);
  delayMicroseconds(10); //
  digitalWrite(trigPin, LOW);
  duration = pulseIn(echoPin, HIGH);
  distance = (duration/2) / 29.1;

  Serial.print(distance);
  Serial.println(" cm");
  delay(500);
}
Servo

#include <Servo.h>

Servo myservo;

int pos = 0;

void setup() {
  myservo.attach(6);
  Serial.begin (9600);
}

void loop() {
  for (pos = 0; pos <= 180; pos += 1) {
    myservo.write(pos);
   Serial.println(pos);
    delay(20);
  }
  for (pos = 180; pos >= 0; pos -= 1) {
    myservo.write(pos);
   Serial.println(pos);
    delay(20);
  }
}
RBT servo

#include <Servo.h>                    // Include servo library

Servo servoLeft;                      // Declare left servo signal
  unsigned char motion = 0;

void setup()                          // Built in initialization block
{
 pinMode(5,INPUT_PULLUP);
 pinMode(6,INPUT_PULLUP);
 pinMode(7,INPUT_PULLUP);
 pinMode(2,OUTPUT);
 pinMode(3,OUTPUT);
 pinMode(4,OUTPUT);
 pinMode(9,OUTPUT);
  servoLeft.attach(9);               //
  Serial.begin (9600);
}

void loop()
{
  motion = digitalRead(5) + digitalRead(6)*2 + digitalRead(7)*4;
  Serial.print(motion);
  Serial.println("");
  switch(motion)
  {
    case 0b00000110:  servoLeft.write(30); digitalWrite(4,HIGH); digitalWrite(3,HIGH); digitalWrite(2,LOW); break;
    case 0b00000101:  servoLeft.write(60); digitalWrite(4,HIGH); digitalWrite(3,LOW); digitalWrite(2,HIGH); break;
    case 0b00000011:  servoLeft.write(90); digitalWrite(4,LOW); digitalWrite(3,HIGH); digitalWrite(2,HIGH); break;
    case 0b00000111:  servoLeft.write(120); digitalWrite(4,HIGH); digitalWrite(3,HIGH); digitalWrite(2,HIGH); break;
    delay(15);
  }
}